Thursday, June 6, 2013

Gaming Mat part II

After letting the mat sit for 24 hours, I slapped a coat of Apple Barrel brown as the base coat. While wet, I shot it with spray paint, some kind if lighter brown. I originally wanted to use all spray paint on this but I was afraid, and probably wrongfully so, of the paint cracking.


Notice how much the dried caulk caused the canvas to shrink up and pull on the nails. Glad I nailed it down!

While the paint was still drying, I started flocking with a mix of dark green, light green, and earth flock all from Woodland Scenics. 


I also was spraying the crap out of everything with watered down pva as I went and gave it two more good soakings with the pva spray throughout the day. 

Tonight I cut it from the board and beheld my creation. It turned out just as all the other DIY folks said it would. Very durable and very little flock shedding. I'll leave you with a few shots. Hopefully I'll get the play on it this weekend!


http://farm8.staticflickr.com/7455/8975272830_94879878ba.jpg

New Gaming Mat part I

I'm sure everyone has seen some of the cool gaming mats that are on the market and that people have made themselves. Typically, I play in my dark creepy basement, which my wife hates. Since she's recently begun getting into playing the occasional game with me, I thought I'd be nice and try to come up with a solution for playing upstairs where she is more comfortable...and frankly so am I.

Enter the gaming mat.


I'm not breaking any new ground here. I've totally ripped this idea off from several others who've done this before. Basically, I started with a 5x5 canvas drop cloth that Home Depot sells for $6. While I was there, I picked up four tubes of Acrylic caulk (called ALEX caulking by DAP) for about $2 a tube and also a bag of play sand since I had run out. The table I want to play on is only 3'x4.5' but I went ahead and made this 4'x4'.


To start, I nailed the tarp down to the back of a 4x4 piece of wood.


Once it was down, I used an iron to get rid of all those folds. I was worried about the wrinkles but honestly I probably could have skipped this step as it laid out flat once the caulk was on it.

Next came the fun and messy part. I put on rubber gloves and squirted the caulk onto the canvas and smeared it around with my hands. I did this in small sections because the caulk formed a skin in about ten minutes. Once I had a section all smoothed out, I'd sprinkle play sand onto it and then grind it in. Here you can see that most of the board is covered except the last 1/5 which I was about to grind the sand into.


Here you can see the surface. 


PART II COMING


Thursday, February 21, 2013

Floating Rocks


Inspired by some of the art work in the Legends of Chima advertising and cartoon, I decided I wanted to try making some floating rocks with a floating waterfall as the center piece. If you've never seen terranscapes pandoran themes board, do yourself a favor and take a look HERE

So with that as additional inspiration, I went to work. I started the same way I would make any rocks, but then I flipped them over. I cut up a bunch of pink foam and layered them from biggest to smallest. I then tried to disguise the seams with bits of scrap foam and then gave each piece a coat of joint compound. For the waterfall, I also used a lighter to burn and melt the small steams that lead to the falls - I just like this effect. Wire hangers (Yes mommy dearest) were dressed up as vines and used to to suspend the the three rocks. Sorry for the lack of wip pics, but I'm sure most of you know how to make rock from foam.


Since I wanted the waterfalls rock to be suspended by the water itself, I needed something sturdy. I went to the dollar store and bought a pair of plastic champaign glasses for, you guessed it, $1. I broke the stems off and hot glued them to the MDF base and to the bottom of the rock. For added strength, I broke off chunks from the remaining portions of the glasses and melted it over the edge of the falls.


The water was then built up using DAP 3.0 crystal clear caulk smeared on witha popsicle stick. It took several layers to get this built up enough and frankly I'm not positive all the layers were 100% cured at the end. Anyway, I tried a different technique than I normally would have. Usually I paint the water color first and then caulk over it. It's a nice effect, and its what i did for the pond, but I wanted something different for the streams and falls. I painted the final layer of caulk blue and then wet blended white from the stream all the way down the waterfalls. The problem with that is that you lose your shine. To solve this, I covered the falls and streams in several layers of mod podge. Then added aquarium plants to everthing and slapped 'em on the table.


I'm calling these done...for now anyway. I feel like they need more vegetation. Would love to hear your opinion! They're studier than I expeced...especially the waterfall rock. There's no wiggle on that piece!


Tuesday, December 18, 2012

Solo SBH Lord of the Rings Campaign, Part 1: About a Book

So I began my solo mini-campaign this afternoon in Tolkien's Middle-Earth...or as close as I can represent it. For a bit more information on how I'm running this, please see my previou blog post. We'll start with the warband pictured here. These guys look familiar? Wrong! They're totally not four of the main heroes from the Lord of the Rings movies! Nope. These guys are totally different. Here are their stats to prove it! 1) Dwarven Fighter: Q3/C4 Group Fighter, Tough, Short Move. 2) Gondorian Healer: Q3/C2 Cleric. 3) Dunedain Ranger: Q2/C4 Forester, Shooter Medium, Fearless. 4) Elven Archer: Q3/C4 Forester, Shooter Long, Good Shot. See? I told you. These guys are nothing like they are in the movies. Well at least Boromir isn't. I wanted a healer and I love this minifig sooooo...sorry Boromir...I turned you into a wussy cleric. Obviously the others are pretty big rip-offs of Gimli, Aragorn, and Legolas but whatever. I like 'em.

Part 1: Fool of a Took
Darkness is speading over Middle-Earth and our four drinking buddies adventurers have been tasked by the famous wizard/veteranarian, Radagast the Brown, to locate a mysterious book called...ummm...THE MYSTERIOUS BOOK OF MYSTERY! They've pushed away from the bar long enough to sharpen swords, fletch arrows, and sober up and are now ready. However, there's one small problem. The book is guarded by a big ol' hairy spider and a burglar is needed. The dwarf could do it, but he's on probation and cannot get busted for stealing again. So, a burglar is a must (sound familiar?). Luckily, the Gondorian Healer knows of a hobbit, a Took of course, who'd be perfect for the job! Well maybe not perfect but he is small and works for mushrooms. Good enough!

The board. (excuse the mess in my basement and the creepy floor that looks like someone was murdered on it.)
Goal: The burglar was last seen searching for mushrooms around the river valley ruins. Check all four ruins. He is found by rolling a 6 on a d6. If not found at first three ruins, he will be automatically found on the fourth. Scenario is failed if any member of the party dies!

Here's a shot of the four terrain pieces that must be checked. As I've described in my previous post, these are treated like rooms in a dungeon crawl. Upon entering them, a die is rolled to determine what the 'room' contains.

Large Hill
Small Woods
Large Woods
Elven...snake pillar...thing.
And we're off!
Our adventurers embark into the river valley beginning first at the large hill.
The short meat shield takes the lead, with the elf being a typical ranged attacker staying out of harms reach. Once the dwarf hit the edge of the hill, I rolled a d6 and...
 
...a three was rolled which spawned 6 Orcs on the top of the hill along with a bag of loot.
After some nice shots by the ranger and the elf and some piss poor rolls by the orcs, two are laying dead.
Speaking of piss poor rolls, the ranger ended up flat on his back. Thankfully the healer was there to lend a hand while the dwarf managed the action.
 
...and there we go. One more death lead to the orcs freaking out and trying to flee. They were quickly dispatched. The leader failed his morale roll on three dice and took a dive off of the hill.
Finally, our Ranger checked the ruins to see if the halfing was anywhere around there...had to roll a six...got a 4. Also rolled to see what kind of loot was there - it was Cram - which grants long move for one turn. This was promptly given to the Dwarf.

Moving across the valley, the small stand of woods was next. On the way, a d6 was rolled for random encounters. Nothing occured. Upon entering the small stand of woods, another d6 was rolled and it too came up as a 3 - which means goons and loot. Two wolves were spawned.

Long story short...

...the wolves were quickly dispatched.

Again, this 'room' had loot, so I rolled on the random table after the conflict and was rewarded with an Elven Cloak, which grants stealth to the wearer. This was given to the Elf because it matched his outfit...that and for the ranged ambush bonus that I think might come in handy.

Again, I rolled to see if the hobbit was around rolling a d6 and needing a 6.
 
Much to my surprise, I rolled a 6! He looked a little shaken up, but being a greatful little man, was willing to join the adventuring party. Hooraay!
 
Closing Thoughs: Well that was uneventful. I only had to explore two 'rooms' and fight two pretty easy battles to meet the objective. I was tempted to ignore that 6 I rolled to locate the hobbit to keep things going longer, but had decided that I wanted this campaign to be honest and real and let the dice decide for better or for worse. 

Now that we have a complete party, the rest of the journey can begin!
 

Easy Transfix Marker/Gelatinous Cube/Blob...thing!

So, I found this great video of a guy making hollowed out Gelatinous Cubes out of clear resin (video found here ). I loved this idea and I give all the props to the owner of the video. While playing Song of Blades and Heroes, I've often wanted some kind of token/marker to indicate when a model is transfixed. I know I could just use a wooden token, but I wanted something that looked cenematic. These cubes seemed like a cool way to do this. As I've stated before, I'm lazy. I haven't the time or the skill to mess with resin, making molds, etc. So I thought I'd figure out a way to make my own. Mine will not be nearly as nice as the ones in the video, but I was pleased with the results.


First, I started with this dice box. Every wargamer has at least one of these things laying around. They come in different sizes and shapes, but this is one of the more common ones. This one easily fits over the top of my Lego figs including the base, and would easily fit any 28mm model.


I then took some crystal clear DAP 3.0 sealant, put it in the caulking gun, and spread it all over the box. I feel I should note that while I'm not aware of there being any hazard to handling the DAP 3.0 after it's cured, if you grow a third eye, it's not my fault.


Using a stick, I gently spread the caulking around the dice box to achieve a rippled effect that I was happy with. Be careful to move in smooth motions and don't pull up on the sealant too quickly to reduce your chances of ending up with big bumps or spikes - unless that's the effect you want.


Once that was done, I set the box on some wax paper to dry. Make sure you do this so it doesn't adhere to anything you don't want it to.

 
24 hours later, I had one finished cube, token, thingy! After it's fully cured, the outside is rubbery but not sticky.


Here's a shot of the inside. You can see that you have plenty of room on the inside of the box.


I liked it so much, I made six more.


So how's look on the tabletop? I've enlisted the help of Gandalf the Grey to demonstrate. Here we see our fearless wizard facing down three orcs and two cobras in a deep dark dungeon.


**WIZ-BANG-CRACKLE** (was that believable?)


That oughta hold'em.


Do not mistake him for a conjurer of cheap tricks!

So that's it. Pretty easy. Somethings I've noticed:
1) While the DAP is stuck very well to the plastic, with some intentional pulling, can be completely removed. It peels off like one of those masks in Mission Impossible. I've tried it, and it leaves no permanent mark on the dice box.
2) The DAP does not take paint well. Again, I've tried this. It looks terrible. If you wanted a blue or green Jell-o looking blob, I'd recommend painting the box with some of that stain glass paint (or some other translucent paint) and then applying the DAP. You might be able to mix the DAP with some ink or something in a cup first, but I have no idea if that'd work.

Anyway, there you go. Let me know if you try this for yourself! I'd love to see what other's are doing.

Modest Magic Dungeon Review

Since getting into this hobby, I've wanted to make a dungeon terrain set. Time and a complete lack of willingness to learn how to cast good looking terrain has kept me away from it. Then Nick from Modest Magic (www.modestmagic.com) came along and made all of my wildest dreams come true. Yup. All of them. Well, at least my dreams of having an easy and good looking tabletop dungeon without breaking the bank or having my wife file for divorce because I spent 2 straight years in the basement making plaster squares. Enter the Modest Magic Dungeon Kit.

Before I get too in depth, I'd highly recommend taking a look at the Modest Magic YouTube channel. Nick has quite a few videos up explaining what he does and how his product works. Also, in the interest of full disclosure, I should note that Nick was kind enough to throw in 3 extra floor tiles because he was late sending out the terrain due to getting sick. I tried to talk him out of it, but he insisted. Yay for free stuff!

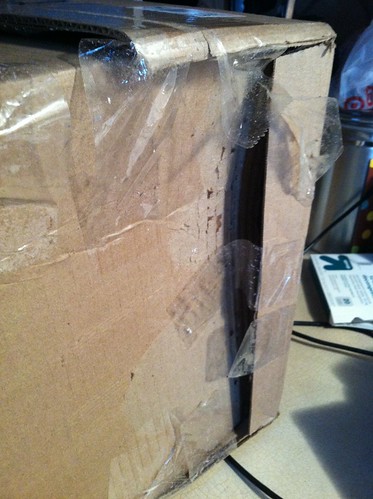
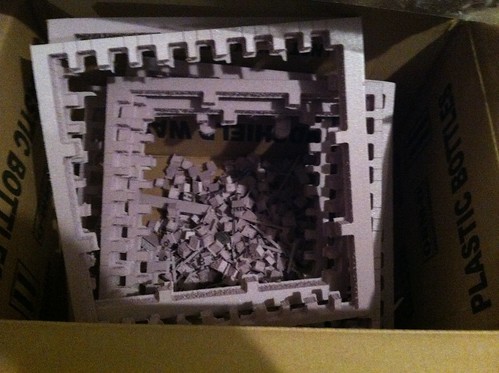
The package made it safely to me despite the Post Office trying very hard to destroy it.
Exhibit A:


No worries. A quick look inside revealed that no major damage was done - I say major because one of the floor tiles had a bent corner that I was able to push back down.


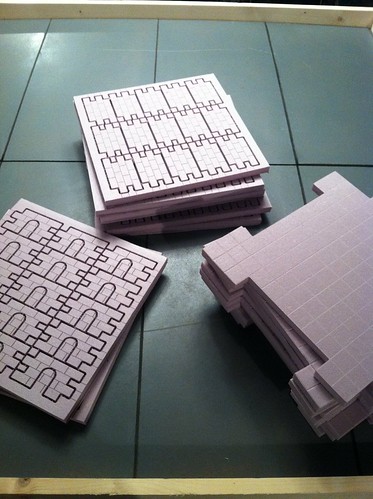
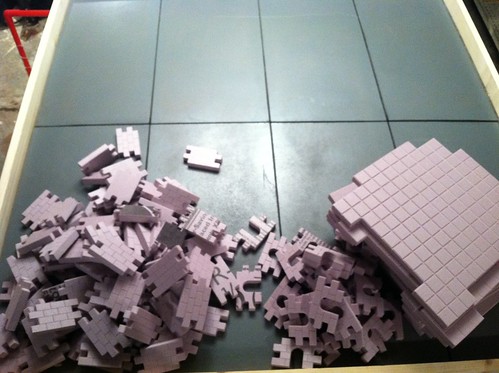
Here you can see the whole lot pulled out.


And here you can see them divided into three piles: 30 doors, 90 walls, and 9 floor tiles (or 12 in this case).


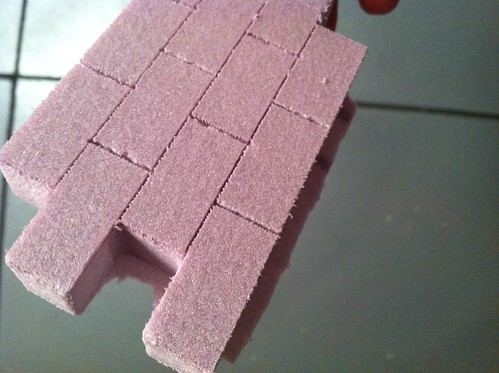
Punching the pieces out was a lot easier than I thought it would be. Nick has a helpful video on his channel showing you the best way to remove the pieces.


Here is a close up of a punched out wall. There is a little bit of flashing that needed to be removed from each piece but it all comes of just by running your thumb over it.


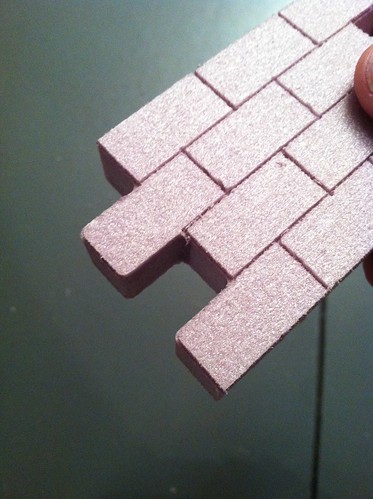
Here are my door and wall piles after de-sprueing all of it. This probably took me about 45 mins or so...or in gamer terms, this took about a beer and a half.


As a side note, there's a healthy portion of left over bits that'll come in handy after you pop all the pieces out.


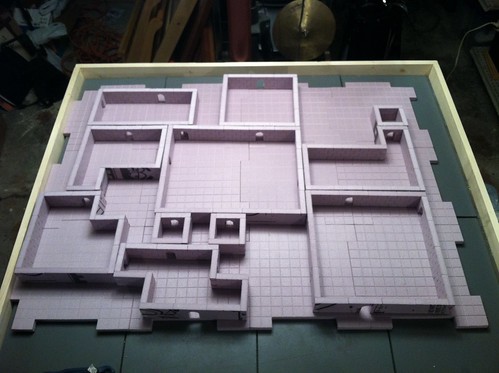
So here's what I ended up with after deliberating over room size. The walls and doors were glued with hot glue but nothing was glued to the floor tiles so that they can be moved around or used for other purposes later on.


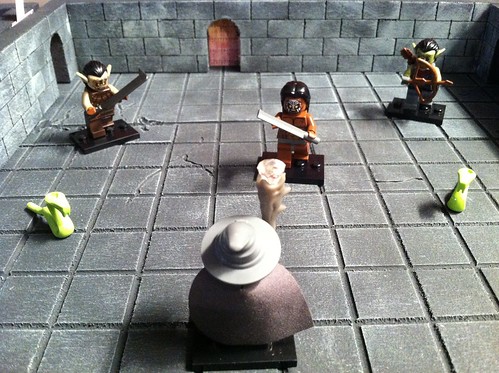
Because I'm a wierdo and I game with Lego minifigs, I needed the rooms to be a bit larger than the average 28mm gamer. If I were using 28mm figs, most of the rooms would have been 3 or 4 wall sections max on any side. However, the biggest room here is 4 sections by 5 sections.

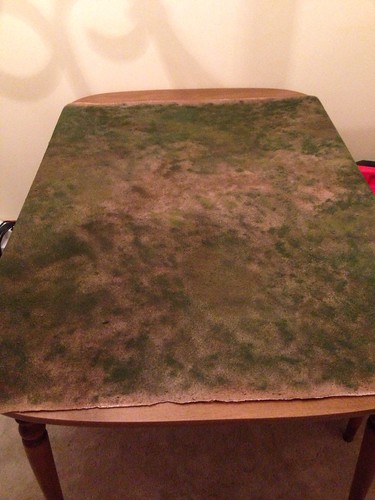
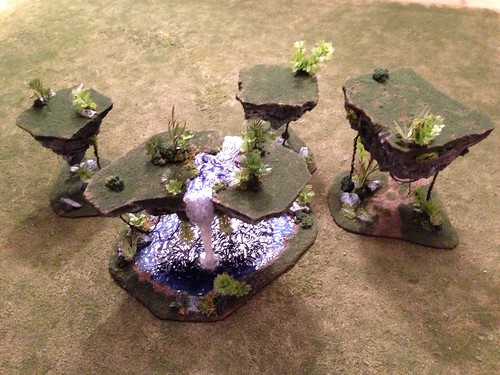
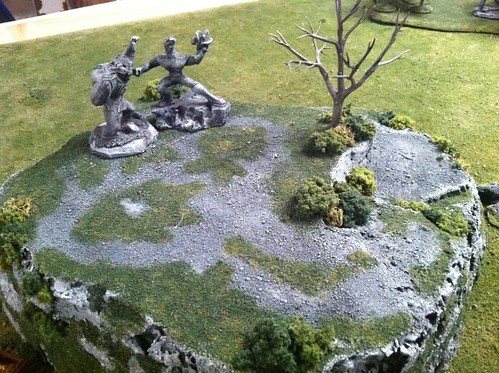
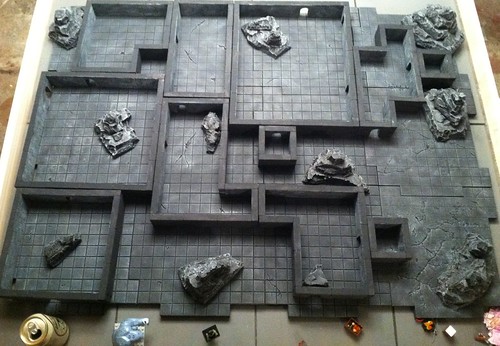
And here's the semi finished product. This is sans washes or flocking and it could definately use another layer of black on the tops and backsides of the rooms, but I was just too excited to slap it all together and get it posted. I threw in some BGW rocks in for good measure. (note the mad-delicious Yuengling beer can in the bottom left. Its how all terrain projects should begin)


You'll notice that some of the lines between floor tiles are noticable. I blame two things for this.
1) the reversable gaming tabletop that this is sitting on has a slight bow in the middle causing some of the tiles to pop up.
2) I'm a below average painter. I failed to get a consistant dry-brush coat over the entire grid which causes those spaces to be more noticable.

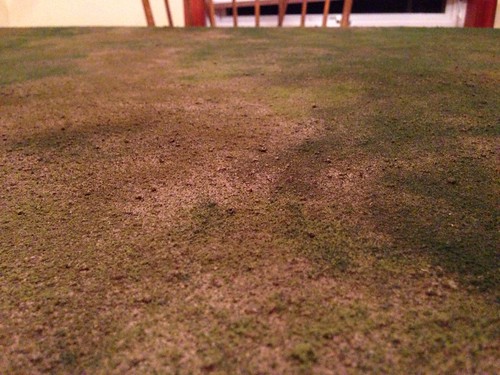
***While I'm super exicted about this kit, I would be remiss I did not point out the one problem I noticed - the lines in some of the floor tiles had inconsistent depths. Some tiles had really deep lines and some had very shallow lines. I'm assuming this is an issue with the material not being 100% consistently thick all the way through and is probably something that is near impossible to avoid. I would not let that turn anyone off though. It really didn't bother me. There was one tile that this was extremely noticeable on, so I beat it up and burned cracks into it to make it a feature rather than a flaw. You can see this tile as the far bottom right tile.*** (edit: Nick contacted me after this post explaining that the three tiles he gave for free where three test pieces that had inconsistent tile depths. This is not a problem on any other set.)

Final thoughts: this set is awesome....especially for the price tag. The pieces go together very easily and look great in my opinion! Even if Nick was a jerk, I'd still love this product. Thankfully, he's a terrific guy who is really excited about his company. I can not recommend this stuff enough.

All in all, this is a wonderful product and I give it two thumbs up!